
Add beautiful maps to your React app with Mapbox GL
A step-by-step guide to embedding Mapbox Standard in React: set up the map component, configure the camera, sync light presets with your theme, add a location badge overlay, and place a custom marker.
Location
New York, NY
The Met on the edge of Central Park at dusk (which is one my favorite places to visit). Mapbox Standard's dusk preset pulls a surprising amount of detail out of the buildings and tree line. It gives like an Apple Maps level of quality to your maps. This is the component we'll build toward below.
I recently had to add a map to a React app and was not sure what to reach for. After some research I landed on  Mapbox GL JS, and it turned out to be both easier and more capable than I expected.
The map above is the finished piece. Below we build it in order: create the component, configure the camera and padding, pick a lighting theme, then drop in a marker. Play with it first: zoom, ctrl + drag for pitch and rotation, or shift + drag to scale.
Getting Started
You need a Mapbox account and an access token. Sign up at  Mapbox Account and grab the token from the account home page. The free tier includes 50,000 map loads a month, which is plenty for most side projects.
Install the library, then set the token. In Next.js that means a NEXT_PUBLIC_ env var so it is available in the browser:
JavaScript'use client'

import { useRef, useEffect } from 'react'
import mapboxgl from 'mapbox-gl'
import 'mapbox-gl/dist/mapbox-gl.css'
import { useTheme } from 'next-themes'

mapboxgl.accessToken = process.env.NEXT_PUBLIC_MAPBOX_ACCESS_TOKEN
Creating the Map Component
Two refs keep things stable across renders: one for the DOM container, and one for the Mapbox instance so we do not recreate it on every update. Props like lng, lat, zoom, and pitch point the camera. Full options live in the Map API reference.
Initialize once inside useEffect. If map.current already exists, bail early.
JavaScriptexport default function Map({ lng, lat, zoom = 2.5, pitch = 25 }) {
  const mapContainer = useRef(null)
  const map = useRef(null)

  useEffect(() => {
    if (map.current) return
    map.current = new mapboxgl.Map({
      container: mapContainer.current,
      style: 'mapbox://styles/mapbox/standard',
      center: [lng, lat],
      zoom,
      pitch,
    })
    // ...
  }, [])

  return <div ref={mapContainer} className="map-container h-full w-full" />
}
Configuring the Map
Once the style loads, set the basemap lighting and a little left padding. Padding makes room for a location badge and keeps the pin from sitting under the overlay on wide layouts.
For the cover demo, the camera points at The Met on the edge of Central Park:
JavaScriptuseEffect(() => {
  if (map.current) return
  map.current = new mapboxgl.Map({
    container: mapContainer.current,
    style: 'mapbox://styles/mapbox/standard',
    center: [-73.963244, 40.779437], // The Met, NYC
    zoom: 15.5,
    pitch: 45,
  })

  map.current.on('style.load', () => {
    map.current.setConfigProperty('basemap', 'lightPreset', mapTheme)
    map.current.setPadding({ left: 150 })
    // ...
  })
}, [])
The badge itself is just absolute-positioned JSX on top of the map. You do not need to register it with Mapbox:
JavaScript<div className="relative" style={{ height: 400 }}>
  <Map lng={-73.963244} lat={40.779437} zoom={15.5} pitch={45} />
  <MapLocationBadge place="New York, NY" />
</div>
Location
New York, NY
Applying Themes
Mapbox Standard ships four light presets: day, night, dusk, and dawn. That lightPreset call above is where you pick one.
I sync the map with the rest of the site using next-themes, so it follows light and dark mode automatically. You can also hardcode dusk when you want a specific mood, like the Met cover at the top of this post. If the theme can change while the map is mounted, update lightPreset again whenever resolvedTheme changes.
JavaScriptconst { resolvedTheme } = useTheme()
const mapTheme = resolvedTheme === 'dark' ? 'night' : 'day'
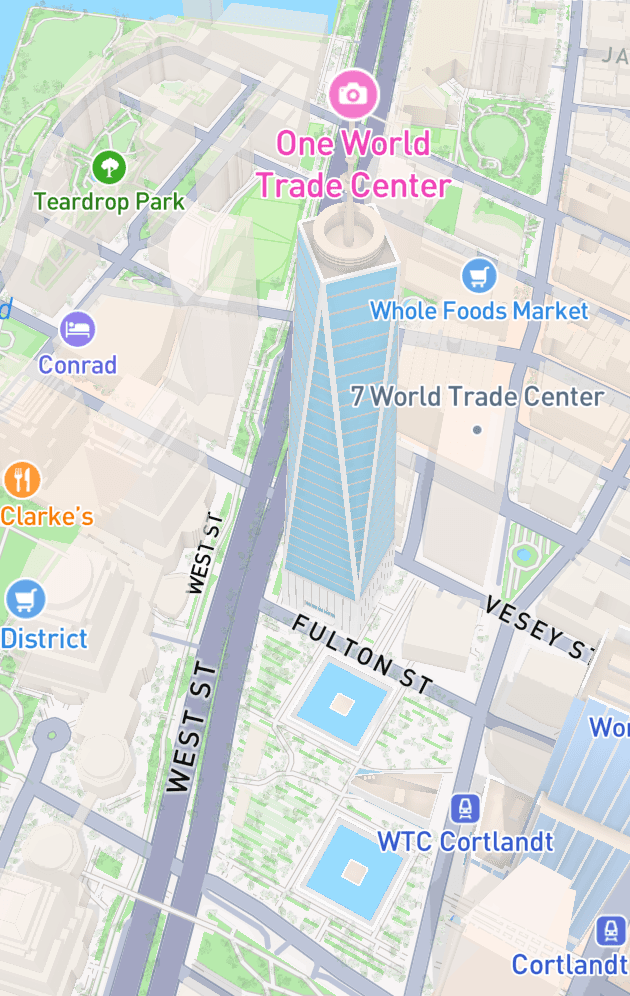
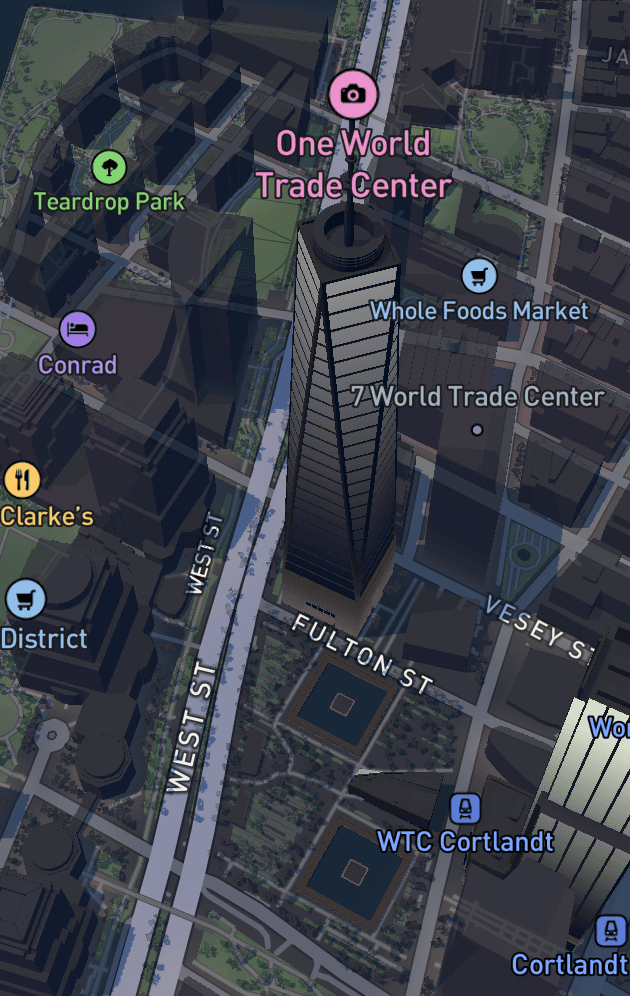
One World Trade Center in New York City. Day is clean and easy to read, great when the map is mostly functional. Night is where Standard gets fun: building windows light up and 3D landmarks pick up a warm glow that feels almost cinematic. Dusk and dawn sit in between if you want atmosphere without going full night.
Adding a Marker
Finally, add a marker for the point of interest. It can be any HTML element. A small span with a CSS class is enough, and you can style it however you like.
JavaScriptmap.current.on('style.load', () => {
  map.current.setConfigProperty('basemap', 'lightPreset', mapTheme)
  map.current.setPadding({ left: 150 })

  const el = document.createElement('span')
  el.className = 'map-marker'
  new mapboxgl.Marker({ element: el, anchor: 'center' })
    .setLngLat([-73.963244, 40.779437])
    .addTo(map.current)
})
CSS.map-marker {
  width: 24px;
  height: 24px;
  border-radius: 50%;
  background-color: var(--accent);
  border: 3px solid rgba(255, 255, 255, 0.95);
}
Do not set transform on the marker element. Mapbox uses it for positioning, and a custom transform will throw the pin off the building.
Location
New York, NY
Conclusion
Remember ref={mapContainer} on the div Mapbox should render into. Putting it all together:
JavaScript'use client'

import { useEffect, useRef } from 'react'
import mapboxgl from 'mapbox-gl'
import 'mapbox-gl/dist/mapbox-gl.css'
import { useTheme } from 'next-themes'

mapboxgl.accessToken = process.env.NEXT_PUBLIC_MAPBOX_ACCESS_TOKEN

export default function Map({
  lng = -73.963244,
  lat = 40.779437,
  zoom = 15.5,
  pitch = 45,
}) {
  const mapContainer = useRef(null)
  const map = useRef(null)

  const { resolvedTheme } = useTheme()
  const mapTheme = resolvedTheme === 'dark' ? 'night' : 'day'

  useEffect(() => {
    if (map.current || !mapContainer.current) return

    map.current = new mapboxgl.Map({
      container: mapContainer.current,
      style: 'mapbox://styles/mapbox/standard',
      center: [lng, lat],
      zoom,
      pitch,
      config: {
        basemap: {
          lightPreset: mapTheme,
        },
      },
    })

    map.current.on('style.load', () => {
      map.current.setConfigProperty('basemap', 'lightPreset', mapTheme)
      map.current.setPadding({ left: 150 })

      const el = document.createElement('span')
      el.className = 'map-marker'
      new mapboxgl.Marker({ element: el, anchor: 'center' })
        .setLngLat([lng, lat])
        .addTo(map.current)
    })

    return () => {
      map.current?.remove()
      map.current = null
    }
  }, [])

  return (
    <div
      className="relative overflow-hidden rounded-3xl border border-border bg-muted"
      style={{ height: 400 }}
    >
      <div ref={mapContainer} className="map-container h-full w-full" />
    </div>
  )
}
Want the cover-style flyover? After style.load, ease the camera in:
JavaScriptmap.current.easeTo({
  zoom: 15.5,
  pitch: 45,
  bearing: -28,
  duration: 3200,
})
Start a little wider and flatter, then ease into those values. No extra animation library required. From there you have an interactive Standard map you can theme, annotate, and drop pins on.